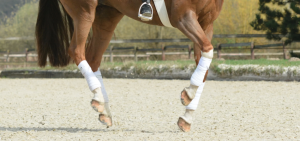
A well-fitting saddle is worth its weight in gold! Unfortunately, the search for the right saddle is a topic that drives many riders to despair. Many are uncertain about whether a saddle provides the right fit or not, and competent professionals – good saddlers – are hard to find. We have a self-check that will clearly show every rider where the saddle should sit and where it shouldn’t. And yes, it goes beyond basic rules like “Leave room for the shoulders”. Try it!
Most saddle problems arise from it pinching somewhere – it’s too narrow, too long, it doesn’t have the right balance. But how can one tell if it fits properly? Statements like “behind the shoulder and no longer than the last rib!” are not completely wrong, but neither are they completely accurate. We explain step by step how to measure your horse yourself, and thus obtain more exact information on just where your saddle should lie. So, for your next trip to the stable bring some chalk and these instructions, ask for the assistance of a colleague for one of the steps, and get to work!
Step 1:
Have pieces of white and coloured chalk handy. The horse should be tethered and groomed. First, mark a vertical line at the place on the withers where the horse’s shoulder appears to be broadest.

Step 2:
Feel the shoulder blade with your hands and determine where it ends. Make a second line there, also vertical and downwards, parallel to the first.

Step 3:
This step is a little bit more complicated, so you may need an assistant. Because the front leg on the side where you’ll be marking will be lifted, and pulled forwards – not backwards, like when shoeing a hoof. This makes the shoulder blade move. The shoulder will rotate towards the back. Make your third mark exactly at the furthest spot where the shoulder blade moves.

Step 4:
This step is easy again: with your fingers, find the last (18th) thoracic vertebra and mark it.

Step 5:
Measure ten centimetres from this vertebra chalk mark in the direction of the hips (a little more than a normal hand-width). Here, mark another line going downwards. One finds the explanation for the sensitive area within these ten centimetres in Jochen Schleese’s book: “This area, the lumbar region, is where the horse’s bucking reflex point is located. If the saddle is too long and covers this area, it may be the cause for passes, four-beat canters, extra steps during flying changes, bad behaviour and bucking.

Step 6:
Now feel along the spine with your thumb and the palm of your hand, and mark where the spinal cord ends. Begin at the third or fourth chalk line and feel the vertebrae and the transition to the Musculus longissimus, the large back muscle. This transition, this border between vertebra and muscle is important. Make a horizontal mark here, where you can feel the M. longissimus and no longer feel the vertebra.

Step 7:
Now feel as much as you can of the entire width of the back muscle. From the upper horizontal line (the one that was made in step 6) travel downwards firmly with your fingertips and feel where the M. longissimus ends and a more or less strong recess marks the transition to the intercostal muscle. Here, draw a second horizontal line from the second to the fourth vertical mark. The resulting bar shape is the area of the Musculus longissimus. Fill it in with white shading, because it is important: this is exactly where the saddle should lie.

Step 8:
Now pay attention, this is where it gets interesting. We’re now going to mark a region where there should never be any pressure from a saddle. On each side of the withers there is an area where you’ll find many nerve endings, the supraspinous ligament, the nuchal ligament and the important muscles M. trapezius, rhomboideus and spinalis. In this sensitive area comes so much together, like the withers “cap”. To find this area, start at the top of the second vertical chalk mark and measure 10 cm below it. Place your chalk here. Now make a line to the top end of the third line. You will have a V-shape which, when you connect the upper ends of the third and second lines, will become a triangle. Voilá: this triangle is what it’s all about. Fill this in, as it must be kept free!

Step 9:
With your fingers locate the Musculus lattssimus dorsi, near the edge of the saddle flap and the girth. Its edges run just about where you see the red cross in the picture. Nothing should press here! Nor should there be any pressure between the first and second chalk mark, and between the fourth and fifth chalk mark, in the triangle at the withers.

Step 10:
The saddle area is now completely marked. Here, where the longissimus offers optimal protection, is where a saddle can be placed and can transmit weight. It’s the area shaded white in our picture. One can clearly see how long the saddle may be and how much room must be left free at the withers, especially at the sides.

Caution: We assume no liability for disappointment should you find that your own saddle protrudes over the marked area and is therefore, according to this measuring method, no longer suitable! All kidding aside: isn’t this an excellent guideline for giving the rider a reliable first impression? Of course, there is more to whether the saddle actually fits – an assessment of the bearing surface is extremely important, but will be only one piece of the puzzle.
All rights for the photos are reserved by Jochen Schleese.