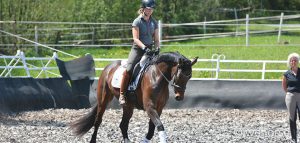
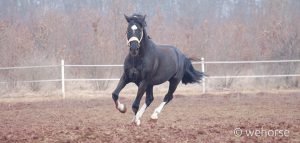
“One of these days I’ll have to do something about my riding seat!” – who among us hasn’t thought this? Simply starting will help considerably. We’ve compiled the best exercises for your riding seat, which you can do the next time you’re in the saddle. Good luck!
Summary
- Improving the independency of the hands
- Bring your upper body up!
- Develop an energetic seat
- Breathe
- Counting backward
- Loosing up your pelvis
- The whip trick
- Loosen you knees
- Improve body-awareness
- Riding better lateral movements
1. Independency of the hands
For our first riding seat exercise, your hands need to be free. Either someone is holding the lunge, or you have a very well-behaved horse. Tie the reins in a knot and simply go large. Trot lightly and raise your hands as if you’re juggling, moving them up and down in alternation. Keep your hands flat, fingers closed, palms facing upwards. This riding seat exercise teaches rhythm, coordination, rein independence and upper body stability.
This exercise is done by both riding students as well as pros like Uta Gräf. If you van do this with free hands successfully, you can use balls to make it more difficult: The balls are put inside socks that are tied to a cord, so that they won’t fall. Hang this cord from your neck to keep the balls at hand. Try this – at first just a bit, then a little higher.
2. Bring your upper body up!
A very simple riding seat exercise that you can do covertly: Purposefully turn your head in all directions. Look at each other in the arena. Keep your chin high.

3. Develop an energetic seat
Change the setting of your stirrups several times during a riding session. Varying stirrup length will help give you a more energetic riding seat. One basic rule: stirrups that are too long block the hips and will give you a fork seat, while stirrups that are too short put you in a chair seat, neither of which are conducive to a good riding seat.
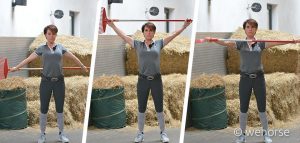
4. Breathe!
This is another helpful riding seat exercise that you can do without anyone noticing! Exhale, and let the exhalation bring you deeper into your seat, explains Marlies Fischer-Zillinger. The right breathing technique can help the rider use positive tension and even set the tempo. To learn how, use this exercise: Inhale, then close your mouth, keeping your lips relaxed and loose. Exhale, pushing the air out between these loose lips. Don’t purse your lips into a kissing shape! Mind that you don’t lose tension in the torso. You can also wrap a resistance band around your back and abdomen to feel this better.


5. Counting backward
Practice exhaling again, using the exhaled air to count, not too softly, but with force so that body tension is maintained. Start counting from twelve, i.e. “twelve, thirteen, fourteen”, etc. You can see exactly what this does starting at minute eleven in the video.
6. Loosing up your pelvis
This riding seat exercise helps train you to keep your pelvis loose while keeping your torso stable. You’ll ride with the reins in one hand. Extend your free arm above you, with your fingertips toward the roof or the sky. This will allow the movement between the chest and pelvis to be somewhat more separate. The chest remains stable, and the pelvis can work with more elasticity. Do this is a walk, trot, and canter. You’ll find a thorough explanation of this exercise to improve your riding seat by Marlies Fischer-Zillinger in her videos.


7. The whip trick
In a light trot, rest a whip sideways over your hands. It should be lying horizontally in front of you. Place your thumbs over it to keep it from sliding off. Is that difficult? Or easy? This will help you to see whether your hands are completely independent from your rising trot.
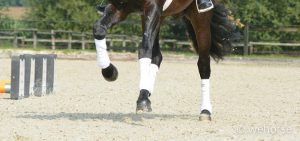
8. Loosen your knees
Trot in a circle. For a half a circle length do a light trot, then, go in a forward seat in the other half of the circle. Keep alternating. Concentrate on your knees: do your joints move loosely along with the trot? How well are they lying against the horse? This constant change of movement on one hand allows you to better observe and control your body, and to improve your seat on the other.
9. Improve body-awareness
To develop a good riding seat, the rider needs supple joints that can move along with the movement of the horse. But many of don’t have a great deal of body awareness, and therefore don’t really know whether a joint is loose and supple or not. This exercise by Marlies Fischer-Zillinger helps train self-awareness and improves flexibility. First, press your heels downwards. This is what you should avoid – because even if it fulfils the command for “heels down”, you are blocking all your joints. Now consciously let up on your heels a little bit, so that they’re just a little further up and let your knees and hips have a little more spring. Test this first in a walk, then in a trot. Keep alternating between pushing through firmly and lifting slightly and finding more spring!
10. Riding better lateral movements
Tip for the sofa: If you have difficulties with your riding seat in lateral movements (too much effort without effect, distortions, futility) Marlies Fischer-Zillinger will show you exactly how to develop a proper riding seat and how a good seat can improve the quality of lateral movements. Try to stand up, by only using your thigh muscles while at the same time not leaning forwards with your upper body. Do you feel your muscles working?
Find out more on our dedicated YouTube playlist.